

Tuesday, 14 September 2010
I hesitate to post this
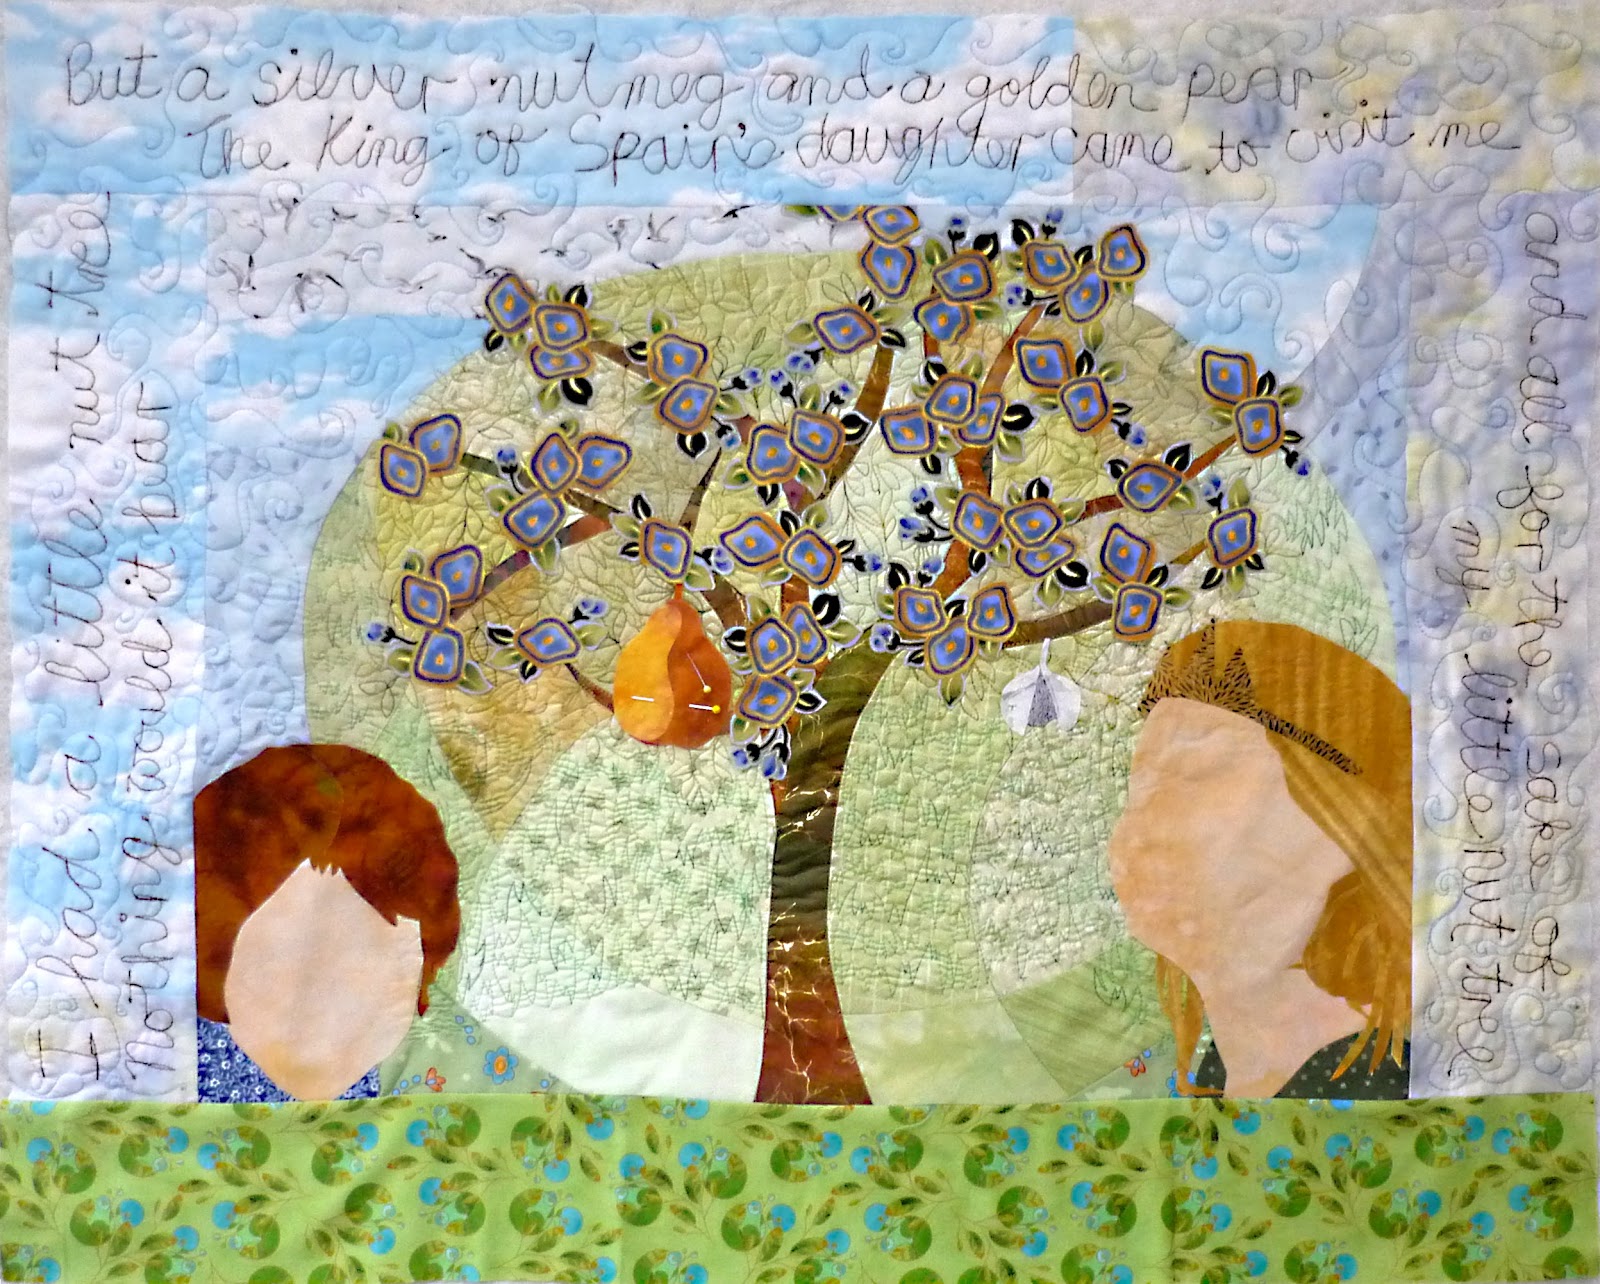
because the faces aren't finished yet... I've unpicked and resewn the shading on Aimee's face three times and its still not right. Jess's seems to be going more easily but I'm not so far down the track on her face yet.

Sunday, 12 September 2010
Stones Finished

So, I've finished the small A3 size quilt I started in Chris Kenna's workshop on Saturday. I'm rapt with the quilting and now that I've learnt how to do these contour lines with a neat back to the quilt I will be using a similar technique to finally quilt my large Delphinium I quilt. Hopefully in time to submit for Symposium next April.
Chris taught us to start with five small (0.5 stitch length) stitches before starting the row and finish again with another 5 small stitches. This produces a much neater back than using the automatic stitch finishing on either of my machines. Chris also suggested using an envelope turn to finish the edges rather than a binding - bindings can be proportionally too large on such a small quilt. To do this you take two pieces of fabric each the same width as the quilt and each about 2" or 3" longer than half the length of the quilt. Put the quilt face up on the table. Place the pieces of fabric face down on the top of the quilt matching the sides and top and bottom of the quilt so that the extra lengths overlap in the middle. Fold back 1" on both overlaps so that the edges will be finished when turned. Pin in place. Sew a 1/4" seam around the outside edge of the quilt. Turn to the back. Press, making sure the backing does not show from the front. Slipstitch the opening closed. Finish with a row of stitching 1/4" from the edge.
Another thing I learnt from Chris was the motif used on quilting the sky. I should have done it smaller and it definitely needs practice to make it smoother but I'm glad to know how to do it.
Saturday, 11 September 2010
Workshop with Chris Kenna
I'm off today to the second day of a workshop with Chris Kenna. We are making landscapes from our own photos. I really enjoyed her discussion on *looking* at a photo properly, finding out the light source, working out what the colours really are.
 This is yesterday's work - Terry's photo on the right, my pieced version on the left. Today we layer and quilt it before adding an appliqued focus piece. My focus piece will be the stones with their dark shadows. Others will add branches or trees to their landscapes.

Wednesday, 8 September 2010
Saturday, 4 September 2010
Symposium
Next year is the National Quilt Symposium - these happen every two years and next year's is in Queenstown, one of New Zealand's premium tourist destinations. I registered my interest directly after the last one as I have for the last three but I didn't really think I would be able to go. I didn't get to the last one in 2009 either. However, the cards fell right and my good luck was to be invited to join Helen in the motel room she had booked months ago. So I'm going! and I'm very excited about it too :-)
We thought that it would be a good idea for the girls from Wanganui to have a t-shirt so we shopped yesterday and found a red singlet tunic that suited us both. NB: we don't know of any other club members attending symposium but if you are reading this and you are attending and would like a t-shirt - please let me know!) The shirt we chose has a picture on the front (black, silver cityscape) but it was getting difficult to find exactly what we wanted so we decided that we could put our logo on the back. We chose a singlet tunic so that we could wear other t-shirts under it and hopefully could wear it every day. I played with our Cotton-On Quilters logo on the design programme and came up with something I thought was fairly decent. I printed a couple out on to transfer paper and ironed them onto plain white cotton. Here is mine, sewed on with two rows of (stylishly) careless heavy black stitching.


We thought that it would be a good idea for the girls from Wanganui to have a t-shirt so we shopped yesterday and found a red singlet tunic that suited us both. NB: we don't know of any other club members attending symposium but if you are reading this and you are attending and would like a t-shirt - please let me know!) The shirt we chose has a picture on the front (black, silver cityscape) but it was getting difficult to find exactly what we wanted so we decided that we could put our logo on the back. We chose a singlet tunic so that we could wear other t-shirts under it and hopefully could wear it every day. I played with our Cotton-On Quilters logo on the design programme and came up with something I thought was fairly decent. I printed a couple out on to transfer paper and ironed them onto plain white cotton. Here is mine, sewed on with two rows of (stylishly) careless heavy black stitching.


Subscribe to:
Posts (Atom)